Thursday, July 31, 2014

Bacon Fried Corn Bread!


When we first went gluten free, I made the erroneous assumption that cornbread was on the list of safe ingredients. It is made from corn, corn is gluten free, thus cornbread must also be gluten free, right? Wrong! Most cornbread recipes I have come across use a combination of cornmeal and flour; this is also true for most cornbread mixes. My second wrong assumption, was that all I would have to do is substitute a gluten free flour or baking mix, and I would come our with something that resembled cornbread. 

Wrong again. The high starch content of most gluten free flours and mixes causes the cornbread to be about as moist as chalk. One bite is sure to suck the moisture right out of your pucker. It was really quite comparable to the cinnamon challenge! 

After multiple failed attempts, I made my best gluten free corn bread yet! And then I added fresh corn and BACON... Enough said!

Ingredients:

1 1/2 cups corn meal
1 cup gluten free baking mix
1 1/2 tsp baking powder
1/4 tsp baking soda
1/4 cup sugar
1/2 tsp salt
1/2 cup sour cream
1/2 cup milk
2 slices bacon, roughly diced
2 cups fresh corn, 4-6 ears (you can sub one can cream corn and one can drained whole kernel corn if you don't have fresh!)
1 egg
2 cups grated pepper jack cheese
2 Tbsp butter

Recipe:

Preheat oven to 400 degrees.


In a large skillet (cast iron if you got one), cook bacon. 


Add corn and cook until golden brown.

If you are using fresh corn, cut the kernels off and make sure to scrape the cob - this get all of that creamy goodness out! Yum!

 If you are using canned corn, toss the whole kernels in first. Once those kernels have browned, then add the creamed corn, otherwise, the creamed corn will burn and stick to the pan! Not Yum!


In a separate mixing bowl, whisk together dry ingredients.

Add sour cream, milk, fried corn, and bacon. Mix until just combined. Last add the egg and cheese and give it a quick stir. 


Add 2 Tbsp butter to the cast iron skillet. (If you don't have one, any baking dish will do, just make sure to grease it first.) 


Pour the cornbread batter into the prepared skillet or pan.


Bake at 400 degrees for 30-40 minutes, until top just begins to brown.

You can also make these in cupcake tins. Fill the tins 2/3 full and bake at 400 degree for 20-30 minutes.

Enjoy!

Tuesday, July 29, 2014

Gluten Free Quiche

Quiche is my favorite any time, any season dish. You can make this with fresh seasonal produce or whatever freezer veg is on sale, with or without meat, pretty much any way you want it! The key to a good quiche is sautéing your meat and veg before adding them; this way, the only work your oven has to do, is cook your eggs and melt the cheese. I have included some of my favorite flavor combinations, but feel free to toss in whatever leftovers you have in the fridge and let her bake!

Ingredients:

Pie Crust:
1 1/2 cups brown rice flour (Personally, I think this is the only acceptable choice for gluten free crust.)
1 1/2 sticks butter, cold & cubed
1 Tbsp sugar
1/2 tsp salt
3 Tbsp water, cold

Filling:
1/4 lb bacon
1/2 medium onion, diced
1/2 green bell pepper, diced
8oz mushrooms, chopped
2 cloves garlic, minced
5 eggs
1/4 cup of Greek yogurt (you can substitute sour cream or ricotta)
1/4 cup whole milk
1/2 tsp salt
2 cups shredded cheddar

Recipe:

Pie Crust:


Whisk together flour, sugar, and salt. 


Cut in butter, until mixture contains no larger than pea size lumps. (This makes for a super flakey crust!)


Add water, one table spoon at a time.

Form into a disk (basically, form into a ball, and flatten), wrap in plastic wrap, refrigerate for 30 minutes. (This is also important for that flakey crust!)

Preheat oven to 400 degrees.


Roll dough out between 2 sheets of wax or parchment paper. (Gluten free dough can be very sticky, this is the best way I have found to roll it out.)


Remove wax paper from one side. Press dough side into pie dish.


Roll over the top with a rolling pin or press around the edges. (This will create a nice clean edge.)


Remove top sheet of wax paper and excess dough.


Prick with a fork.


Bake at 400 degrees until edges just start to brown, about 15 minutes.

Filling:


In a large skillet, over medium high heat, fry bacon. (I cube or chop mine up first.)


Remove cooked bacon and all but 2 Tbsp grease from skillet. Reduce heat to medium and add chopped veggies. 


Sauté until tender, about 5 minutes. Add garlic and sauté for an additional 1-2 minutes.


Add filling into browned pie crust.

Top with shredded cheese.


In a separate bowl, whisk together eggs, Greek yogurt, milk, and salt. Pour egg mixture over the filling and shredded cheese.


Bake at 375 for 45-55 minutes. The top should be brown and center firm. (If the middle is runny or jiggles, leave it in for another 5-10 minutes.)

Allow to cool 5-10 before cutting. (This will let the center set and allow for actual slices rather than scrambled eggs!)

Enjoy!

Some other flavor combos we enjoy are:

Mushroom, ham, and Swiss
Bacon, cheddar, broccoli
Sausage, onion, and pepper jack 
Spinach, artichoke, and mozzarella

My rule of thumb is to fill no more than 1/2 of the pie with meat/veg. (Basically no more than 2 cups once sautéed.)


Sunday, July 27, 2014

Stuffed Turkey Meatloaf


To me, Sundays are all about comfort food, and when I think about comfort food, meatloaf always comes to mind. I started making meatloaf with ground turkey years ago. These days, it is understood, when I say meatloaf, I'm talking turkey meatloaf. I love turkey, because it is not only a lean protein, but also a versatile one. Turkey, like chicken, is basically a blank canvas; there is very little you can't do with it. In this recipe, I combine meatloaf and flavors reminiscent of French onion soup. Stuffed and smothered, this one is sure to please even the die hard beef loaf lover. I bet I can convert you to turkey!!!

Ingredients:

2.5 lbs turkey
2 cups gluten free bread crumbs (I make my own with the loaf ends of gluten free bread.)
1 Tbsp onion powder
1 Tbsp dried thyme
1/2 Tbsp garlic powder
1 tsp salt
1 egg
1 cup shredded mozzarella
2 Tbsp butter
2 Tbsp olive oil
1 medium onion, sliced
8 ounces sliced mushrooms
3 cups veggi or beef broth
2 Tbsp corn starch

Recipe:

Preheat oven to 375 degrees.


Sauté onion in butter and oil, over medium heat, until caramelized, about 10 minutes.


(To make my bread crumbs, I add the toasted ends of my gluten free loaves to a food processor with my herbs and seasonings and process until combined. This makes for more even flavoring of the meatloaf.)


In a large mixing bowl add ground turkey, bread crumbs, garlic powder, onion powder, thyme, salt, and egg. Mix until combined.


Press 2/3 of the mixture into a loaf pan, I like to line my loaf pan with foil for easy removal. Make a trench.


Add sautéed onions.


Top with mozzarella. 


Cover with the remaining meat mixture.


Bake at 375 for one hour, until cheese is bubbly and begins to ooze out.


In the same skillet the onions were sautéed in, sautéed mushrooms over medium heat until soft, about 5 minutes. 


Add 2 cups of broth to the mushroom skillet. Bring to a low boil.

In a separate bowl, whisk 2 Tbsp cornstarch into remaining cup of broth. Add to mushroom/broth mixture. Stir gravy until thickened, about 2-3 minutes.


Slice meatloaf and serve smothered in mushroom gravy.

I like to serve mine with mashed potatoes and peas, oh my!

Enjoy!!!

Wednesday, July 23, 2014

Almond Chia Bites


My husband subscribes to several health blogs and recently shared one with me on 10 health foods that were not so healthy, one of which is peanut butter. Have I mentioned yet, WE LOVE PEANUT BUTTER!!! The author suggested using almond butter in its place. Lucky for us, our favorite bulk retailer had almond butter on sale, so I decided to pick a jar up and start subbing!

One of my favorite snacks are those popular peanut butter based energy bites, I thought this would be the perfect place to start. These almond chia bites are the perfect poppable snack, and they are a better source of heart healthy fats, vitamins, and minerals than their peanutty buddies!

Ingredients:

1 cup almond butter
1 cup gluten free quick oats (I will say, oats, in theory, are gluten free. It is the cross contamination that poses a problem. If you are not gluten sensitive, or intolerant, there is no need to splurge for the GF ones.)
1/2 cup chocolate chips
1/2 cup unsweetened coconut flakes
1/4 cup honey (I like local honey as it is a better source of that beneficial pollen.)
1/4 cup chia seeds
1/4 sliced almonds, crushed

Recipe:


Mix together all ingredients except for sliced almonds.


I refrigerate for 30 minutes for easier ball rolling.


Form into walnut size balls, and roll in crushed almonds.

Store in the refrigerator, in a sealed container.

Enjoy!


Rosemary Garlic Chicken


After a week of failed recipes, I am elated to announce, we have another winner!!! 

We have had quite the busy week, between doctor appointments, family gatherings, a day at the zoo, and the gym, I have been throwing together quick meals, that haven't always been successful. Last night required another speedy meal to be cooked and assembled in less than 30 minutes, so that we could make it to the gym before child care closed. Like most nights, I didn't know what I was making until I started cooking. I grabbed the chicken thighs that were sitting in the fridge, gave them a quick tossed in some olive oil, rosemary, and garlic and this tasty dish evolved!

Ingredients:

4lbs chicken thighs (8-10 thighs)
1/2 cup olive oil + 2Tbsp for cooking
4 cloves garlic, minced
1 Tbsp dried rosemary (or 2 Tbsp fresh rosemary)
1 tsp salt
16oz mushrooms, sliced
1 medium sweet onion, diced

Recipe:


Toss chicken thighs in 1/2 cup olive oil, minced garlic, and rosemary. Season with salt.

In a large skillet, over medium high heat, melt butter in remaining 2 Tbsp olive oil.

Place chicken thighs in the prepared skillet, bone side up. (You can debone the thighs first to speed up cooking time.)


Cook thighs until the skin is browned and crispy, about 10 minutes.

Flip thighs and cook until done, about 15 minutes.


Remove thighs from skillet. Add onions and mushrooms, sauté until done, about 5 minutes.

Serve sautéed mushrooms and onions over chicken thighs.

I made mashed potatoes and steamed broccoli to accompany mine... My husband and the kids ate every, last, bite!

Enjoy!!!


Thursday, July 17, 2014

Strawberry Ricotta Tart


Emily was invited to a tea party with her cousin this week, so I thought I would look up tea cake recipes to attempt gluten free. I landed on ricotta tarts and worked my magic! The original base called for cookie crumbles, and since I haven't ran across a gluten free cookie I liked, I decided to make a short bread base. This sweet, crumbly bottom is the perfect accompaniment to the ricotta filling. Looking in the pantry I found sorghum flour that I have continued to push aside, because of its bitter aftertaste, and thought what the heck. Surprisingly enough, the tartness provided from the lemons and the richness from the ricotta filling, cuts right through that bitter note. Add a sweet strawberry lemon sauce and these little tarts are perfect for any tea party... Or late night snack!

Ingredients:

Shortbread Cookie:
1 1/2 cups sorghum flour
1/2 cup sugar
1 stick butter, cold, cubed
2 Tbsp cold water
1/2 tsp vanilla extract 
A pinch of salt

Ricotta Filling:
2 cups ricotta cheese
4 oz cream cheese, room temp
2 eggs
1/3 cup granulated sugar
1 Tbsp lemon zest (one lemon)
2-3 Tbsp lemon juice (one lemon)

Strawberry Lemon Sauce:
3 cups fresh strawberries
3 Tbsp sugar
2-3 Tbsp lemon juice (1 lemon)

Recipe:

Shortbread cookie:

Mix flour, sugar, and salt.


Cut in butter into flour mixture. You are looking for an oatmeal consistency. You could use a food processor for this, I just went old school to cut back on the dirty dishes!


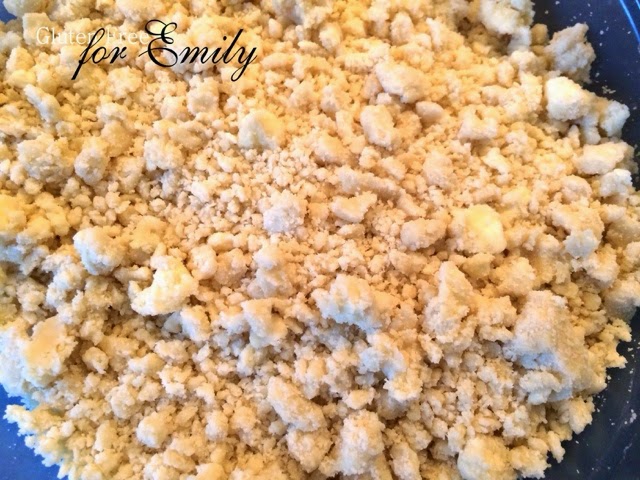
Stir in vanilla, then water, one tsp at a time. Dough should just hold together if you press down, kind of like wet sand.


Form into a disk, wrap in plastic wrap, and refrigerate for 30 min.

Preheat oven to 350 degrees.

Line cupcake tins with parchment cups. 

Divide dough into 12 portions, these should be about the size of a golf ball. 


Press into parchment cups, and fork a few times to vent.


Bake 20 minutes, until cookies are lightly browned.

Ricotta Filling:


While short bread is baking, mix together all ingredients until smooth.

Preheat oven to 375 degrees.


Ladle into cup cake tins, over the short bread cookie. Make sure to fill just to the rim, these will not rise, but they will spill over and you will end up with tarts stuck to your tin. (Like mine!!!)


Bake 25-30 min until the edges just starts to brown.

Let cool.

Strawberry Lemon Sauce:


Add all ingredients in a heavy sauce pan, over medium heat.


Cook 10-15 minutes until strawberries break down and sauce begins to thicken, stirring frequently to keep the sauce from burning.

Spoon overtop cooled ricotta tarts.


Enjoy!!!!